
You can schedule a time to receive training and use this tool by clicking the button at the top of the page. Please keep in mind that reservations can only be made within 2 weeks of the booking time.
Alternatively, this tool is available by walk-in during open lab hours.
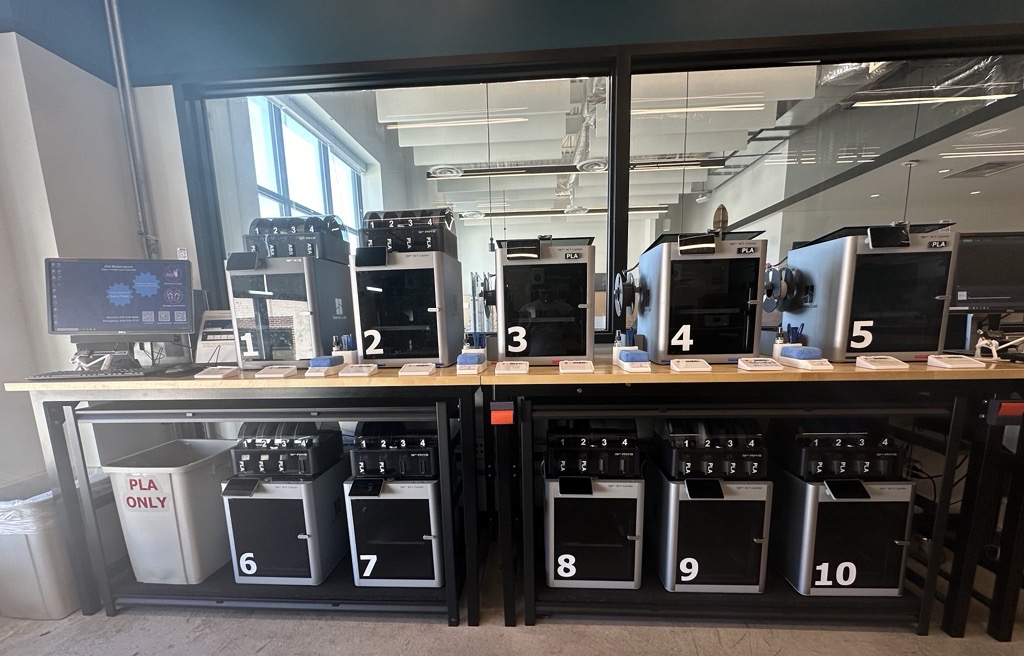
We have 11 Bambu Lab X1—Carbon printers. All of our Bambu printers are fitted with an AMS (Automatic Material System) attachment for multi-color and multi-material printing.
The max build volume is 256mm x 256mm x 256mm (10.07in x 10.07in x 10.07in).
In stock filaments: SUNLU PLA+
Personal filaments may be loaded and used with the assistance of a Makerspace Technician.
Rules and Restrictions
- Prints must not exceed 150 grams of filament OR 12 hours of print time. Please consult the on-duty technician on how to adjust your splicer settings to comply with this rule.
- If you are printing objects for a class, you must provide your own filament.
- No weaponry may be printed (including toy weaponry).
- No offensive images or language.
Procedure
Bambu Studio is the slicer used with our 3D printers. When a printer is available, prints may be started using the computer at the 3D printing station. Only one printer per person may be used at a time.
If printing with a material other than PLA, ask a technician for assistance.
- Follow the instructions below for slicing your print and sending it to the 3D printer.
- Prepare the 3D printer for printing. If printing in PLA, open the top and/or front doors of the printer to prevent overheating. For other materials, the enclosure should be fully shut to prevent toxic fumes from escaping.
- Do not use glue on the magnetic print beds if printing with PLA. If using other materials, ask a technician before using glue.
- If the filament needs to be changed, ask a technician for assistance. Do not replace filaments by yourself.
- Write down your JHED in front of the printer.
- Watch the printer to ensure the first layer sticks before leaving the area.
- Come back to collect your print from the Makerspace during open hours.
Bambu Splicer
Follow the instructions here for slicing your print and sending it to one of the printers.
3D Modeling
3D modeling is the process of developing a digital drawing in three dimensions via specialized software by manipulating edges, vertices, and polygons in a simulated 3D space. The current popular 3D modeling softwares are as follows:
- Solidworks: The most popular choice for 3D modeling by engineers. This is the program you would be using in industry, as well as provided for free by JHU. Find instructions on how to install it for free here
- Creo: Another very popular choice for 3D modeling in industry, though not as popular as Solidworks
- Fusion360: One of the most popular hobbyist 3D modeling software. This software is perfect for team collaboration with its cloud-sharing feature. *Free for .edu emails upon registration
- Shapr3D: Shapr3D is an intuitive 3D modeling program that you can download on your your iPad, and it is compatible with Apple pencils.*Free for .edu emails upon registration
- TinkerCAD: One of the most popular free 3D modeling softwares. It is perfect for hobbyists and for those just starting out.
- OnShape: Online 3D modeling software with basic functions. Its main advantage is that it allows for real-time collaboration, similar to Google Docs. *Free for .edu emails upon registration
If you’re still interested in 3D printing but have no experience modeling, you can find models available online for free at GrabCAD, Printable or Thingiverse. Most likely what you are looking for is already designed and uploaded onto one of these sites.